- Follow us:


Saturday, March 23rd, 2019
Normal
0
false
false
false
EN-US
JA
X-NONE
/* Style Definitions */
table.MsoNormalTable
{mso-style-name:”Table Normal”;
mso-tstyle-rowband-size:0;
mso-tstyle-colband-size:0;
mso-style-noshow:yes;
mso-style-priority:99;
mso-style-parent:””;
mso-padding-alt:0cm 5.4pt 0cm 5.4pt;
mso-para-margin:0cm;
mso-para-margin-bottom:.0001pt;
mso-pagination:widow-orphan;
font-size:12.0pt;
font-family:Cambria;
mso-ascii-font-family:Cambria;
mso-ascii-theme-font:minor-latin;
mso-hansi-font-family:Cambria;
mso-hansi-theme-font:minor-latin;
mso-ansi-language:EN-US;}
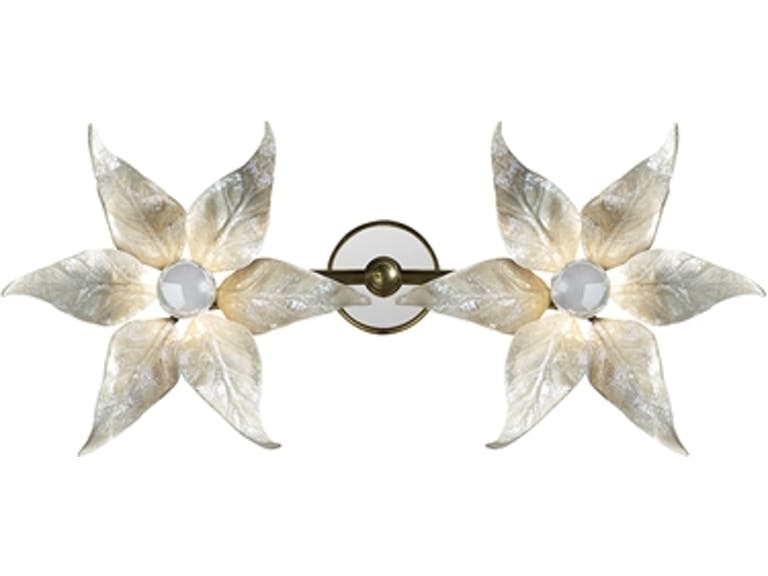
Maitland-Smith Lamps and Lighting Wall Sconce, Floral Decor 8112-19
Ever since man discovered fire and its many uses, he has been doing everything to harness it for heat and light provision. With the advent of newer technologies, fire became candles and candles became bulbs, and pretty soon, fire has become mobile. With it came hazards and some unpredictability, though.
So, is there really a way to catch fire and have it safely contained?
Candle sconces were the first to have it contained. Monks in dark monasteries lit their hallways with these. Pretty soon, elaborate structures had darker hallways so more light was needed. Candle wall scones then came in different styles and materials.
Light display is often linked to religious activities. Every place of worship seems to have its own sets of candles or other sources of light. The Jewish menorah, for instance, is placed on the southern side of the temple, with each of the seven branches representing human knowledge. The central lamp is the representation of God.
The predecessors of wall sconces have had different forms, colors and materials. They also often come in pairs so that they can satisfy the needed symmetry in space.
More often than not, wall sconces are circular and they come with brackets for arms. At least this was the case during the 17th till the 18th centuries. Those wall sconces come with drip pans on their arms are also used to provide light to mirrors like those in a dressing room.
Oval sconces came at around the late 1700s. The rectangular ones followed during the early part of the 19th century. It’s amazing to remember the evolution of these sconces. They also came with heat shields and reflectors and they soon accommodated candles that burned longer.
Wrought nails were also used to hang the wall sconces or these lights were simply hung on a wall bracket.
Modern Wall Sconces
These modern lighting fixtures are now made with different sorts of materials. They can be used as an accent art or as ambient lighting. The history of the candle sconce is pretty rich and its modern alternatives are now being used to contribute to the moods and auras in a home.
The wall sconces are flexible when it comes to decorative uses. They are a good source of illumination while they also offer an aesthetic beauty to the walls. They are an effective means of getting attention to areas that are often ignored.
There are now many designs options plus you can already use them with dimmers so that you can adjust the light according to the mood that you want to evoke at a particular moment.
Wall Sconce Installation
Now that you’re ready to install wall sconces in your home, then you have to follow some simple rules.
First, pick the location of your wall sconces. Now make sure that the power to that room is turned off while you’re working on the installation. To be safe, have an electrician take care of this activity for you.
Remember that the ideal height for wall sconces is about 72” off the floor. Mark the spot with a pencil. Pick also your light switch location or at least point that out to your electrician. If there’s already an existing outlet that you can use, then do so.
Draw the locations for the sconces as well as the light switch. Use the drywall to saw cut those portions out. You could cut initially at the draw lines but you will have to trim some more so you can insert cut-in boxes.
The third step is to drill the holes inside the wall. Be sure to locate this as the same stud bay as that of the light box.
Step 4 is to run a 12×2 wire to the second sconce. Use a fishing tape. Run the wires till you reach the last sconce. You can then run the electrical wire from the last sconce to the location of the light switch.
Lastly, run a 12×2 electrical wire from your switch to your electrical outlet, the cut-in boxes, and then insert the boxes to the wall.
You are now ready to mount the sconces.
Tags: McCreerys, McCreerys Home Furnishings, wall sconce, wall sconce installation, wall sconces
Posted in Accents, Decorative Elements, Interior Design 101, Interior Design Elements, Lighting, Wall Design | Comments Off on Wall Sconces: History and Installation Guide
Wednesday, November 21st, 2018
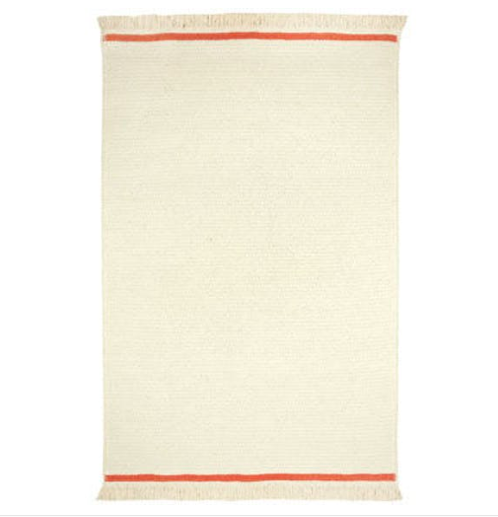
If you can’t decide on a full on wall-to-wall carpet just yet, then you can always begin with this lusciousCapel Incorporated Floor Coverings The Player Rug 0023XS Oatmeal Saffron to jump-start your decorating needs.
Carpet has a long yet exciting history to offer with the earliest records coming all the way from Siberia. The excavated Pazyryk carpet came from a burial mound. This was dug up in 1947 and was declared to be 2.500 years old.
This carpet was intact because it was preserved in an ice block. The beautiful details on the fabric were kept. It came in impressive with 24 cross figures, 24 deer, and 28 men riding on horseback. Its colors have definitely faded but all the details are still pretty clear.
The Hermitage Museum now houses this wonderful carpet. This is in Saint Petersburg, Russia.
As if this were impressive enough, there are even some pieces that are known to be older than the Pazyryk piece. Some come from Iran, China, Afghanistan, and North America. The carpets that were also found there also had their own distinctive styles as well as significant stories to tell. In fact, the cultures of these places pretty much dictate the designs that are used on the carpets.
Fast forward to our time, carpets are now being mass-manufactured with the most crucial innovation being the one from Dalton, Georgia which is also known as the world’s bed sheet capital. Mechanized tufting revolutionized carpeting in the 1930s.
Why Wall-to-Wall?
There are many reasons to fall for wall-to-wall carpeting and this is not just being safe for babies who are just starting to walk.
First, wall-to-wall carpeting offers the best insulation. The carpet insulates as it holds warmth and keeps the cold out. During the colder climates, having a wall-to-wall carpet is a huge advantage. With the energy costs ever rising, it is a good idea to have carpeting in your home so you can save on energy bills.
If you love luxury then you should definitely have your home installed with a carpet. Just think of the most luxurious hotels and you cannot think of one that does not offer chic, lush carpeting.
A third reason why wall-to-wall carpet is great is noise reduction. There are even condominium bylaws that require wall-to-wall carpeting only. That’s a no-brainer considering that condo units are often installed with speakerphones, big screen television sets, sound systems, and computers. There are even those that have noisy gaming consoles.
All these equipment and electronic stuff make sounds and vibrations which carpeting could easily absorb. And if your carpet has a good amount of padding then you won’t have to worry about sound transmission at all.
Let’s not forget safety. Carpeting is also best for cushioning everyone’s footsteps. You also won’t have to worry too much about slippage and falls. This is especially useful if you have toddlers or some senior members of the family.
Another reason to choose carpeting is its durability. Quality carpets can last for many years especially when they are properly maintained and regularly cleaned. And speak of maintenance, all you have to do is to vacuum and to clean the carpet occasionally. With newer technologies being introduced, it is now easy to treat carpet stains.
Carpets are also versatile. There are so many colors, patterns, and styles to choose from. So whether you’re designing a contemporary or a traditional home, there is a carpet that would suit your style.
Softness is yet another carpet characteristic that makes it worth buying. Just face it – the hardwood floors could get noisy especially when there are kids constantly running about.
The cushioned surface that the carpeted flooring offers will surely make your life a whole lot easier.
If you’re still not sold about the idea of a wall-to-wall carpet, then just go for a huge enough area rug.
Tags: carpet, carpet design, designing with carpets, McCreerys, McCreerys Home Furnishings, wall-to-wall carpeting
Posted in Decorative Elements, Flooring Design, Interior Design 101, Interior Design Elements, Wall Design | Comments Off on Wall-to-Wall Carpeting: The Perfect Look for the Holidays
Friday, July 27th, 2018
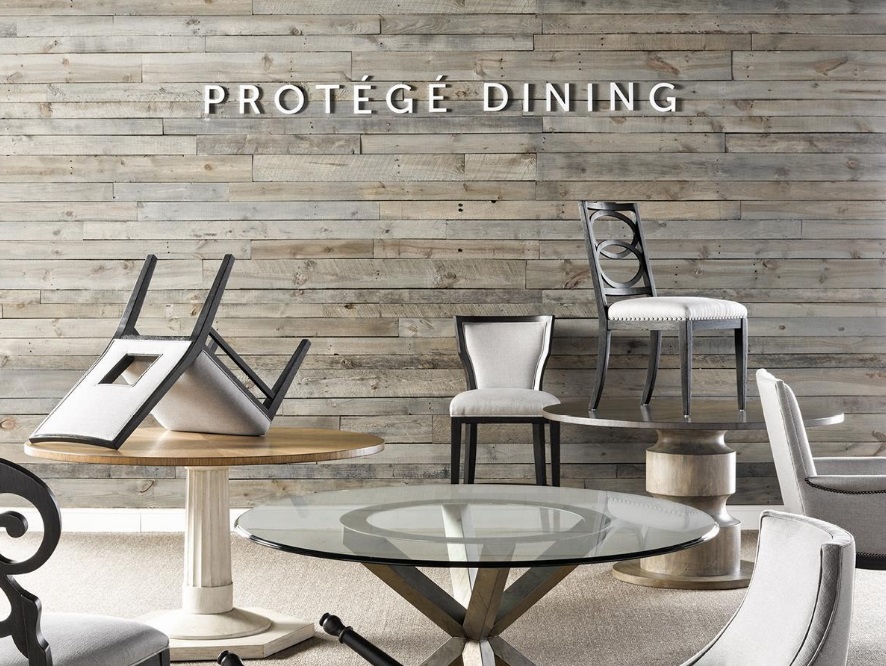
You gotta love those wood paneling on the walls of this Protege Dining Room.
Wood paneling is absolutely back in style especially for those who are embracing the Mid-century modern look in their homes. This throwback appeal is a huge thing these days and if you’ve decided to jump to the bandwagon, then you’re onto something amazing.
If you’re starting a love affair with teak and oak, then this is the perfect set of guidelines to help you especially when you’re considering what to do with your wall paneling.
Wood paneling can absolutely alter your home’s interior design as well as your life. Painting on wood may not be a welcome idea for most men but many designers have been breaking free from this caged notion.
Have a little vision. Look beyond those wood finish and see the possibilities that come with a fresh coat of paint.
Time to Paint
There is no value in outdated wood paneling. But if they’re brand new and you’ve just installed, them, then painting them is still an awesome idea. Here are the materials and tools that you will need –
Water and soap
220-grit sandpaper
Interior latex paint
Multi-purpose primer sealer
3/8” roller cover
Paintbrush
Paint roller and roller tray
And here is the procedure –
This kind of paneling cannot be painted. But if you’ve tested the paneling in your home and they are authentic wood, then do a test patch first. This will show you just how the paint will eventually look.
If you believe that the paint won’t last, then just don’t do it. But if what you have is a regular room with regular people and not a movie house, then the paint should be good.
To make the job easier, use a pole sandpaper. As soon as you’re done sanding, wipe off the dust using a damp cloth then prime the paneling.
Remember that the grooves will remain the same till you fill them. Have them filled with spackling compound. You can also use a drywall compound. Let this compound dry before you begin sanding. You can also choose not to sand if you want a wall with texture.
Tags: McCreerys, McCreerys Home Furnishings, painting the wood paneling, wood paneling
Posted in Interior Design 101, Interior Design Elements, Wall Design | Comments Off on Wood Paneling Painting Guide
Saturday, July 1st, 2017
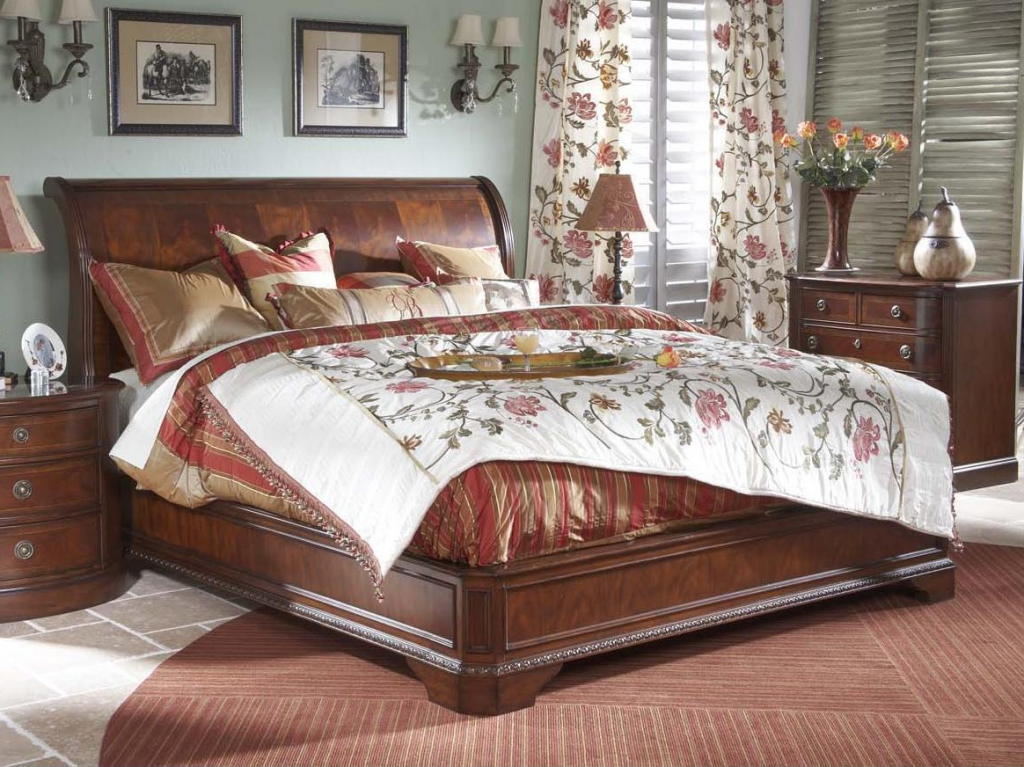
Notice how the framed photos complement the rest of the furnishings? Featured furniture is the King Sleigh Bed from the Antebellum Collection.
When you’ve decided to redecorate your home, the first that could probably catch your attention are the bare walls. As you see these, you are driven to fill up these spaces with stuff that are amazing. The only limit is your imagination.
You can have beautiful walls display artworks which can make the most amazing conversation pieces. These, when chosen properly, can make the most appealing spaces.
Don’t fall victim to what most homeowners resort to which is to paint the walls.
The Dynamic Walls
You need to think outside of the box when you want to infuse design elements in a unique way. Look at bare walls as an empty canvas. This means that you are free to do whatever you want to do with them. Just make sure that what you achieve is something stylish and one that represents who you are.
Just imagine all the stuff that you can use to decorate that bare part of your home – from suspended shelves, framed photographs, artworks, and mirrors – your options are almost limitless.
What is popular nowadays is to use the bare walls as a photo gallery. This could be one framed photo or a series of photos that come in matching frames. You can choose the pictures that are most significant for you and your family. This could be photos of your travels all over the globe or snapshots of special occasions.
You can also fashionably combine different hues then use them as graffiti. Just make sure that create something artistic and not something that is chaotic.
Album covers and old vinyl records are also a trendy way to embellish those empty walls. Give your room an interesting vibe as you create a mosaic-like artwork. Pick a pattern that you’re comfortable with.
You can also make walls less stark as you hang some painted wood panels. Be sure to choose the colors that you love then have them nailed neatly onto the walls. You can also create fabric art using your most creative mind.
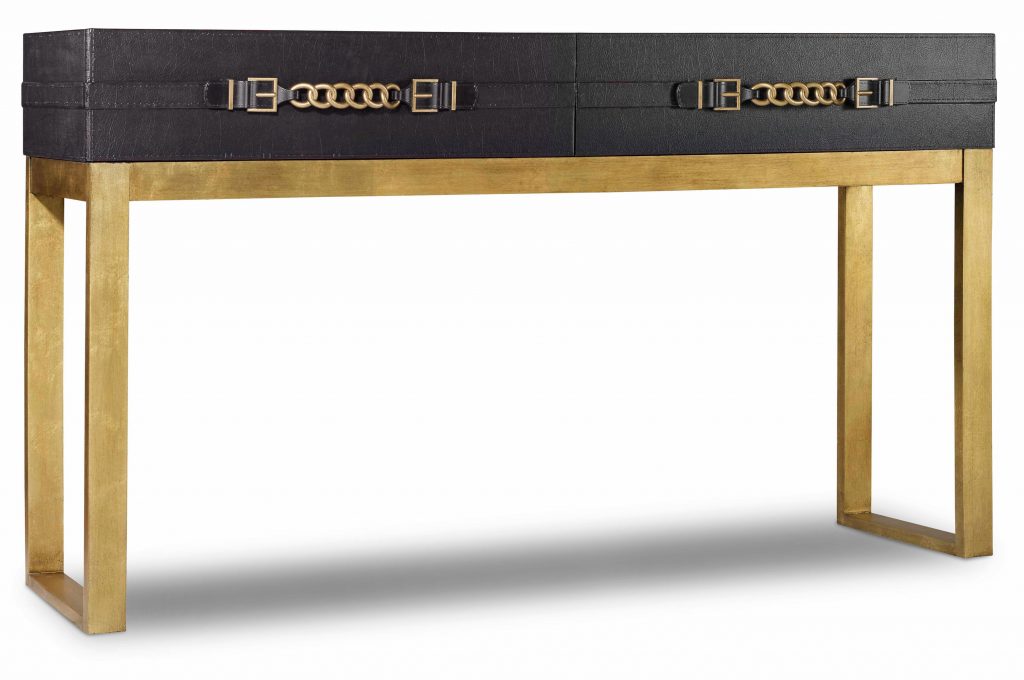
How about drawing attention to accessories like an oversized framed poem? A massive print could be both contemporary and modern. It could go with a modern console table which is then flanked by a duo of Industrial style wall sconces.
You can also update botanical prints by having them laid on a blank canvas. You can then spray them with paint or have them brushed with watercolors. These can then come up with the loveliest silhouettes that are inexpensive yet classy.
And whoever said that a calendar cannot be used as a wall décor? In order to create a more unique wall calendar, be sure to mount it on a frame with the glass removed. Be sure to line the inside part of the frame with a colorful scrapbook paper.
‘Ever seen those lovely, framed butterflies? You can now use them to decorate the once bare walls. The boring sitting room could now become a more interesting place when you place the framed butterflies right by the large bay windows.
If you have a small yet bare wall, then don’t let its size stand in your decorative flair. Be sure to hang a pair of shelves placed at floating angles on the blank wall. Fill the floating shelves with lovely framed photos, books or chinaware. These are the items that can definitely make your display pop.
If you have a larger wall to fill, then you might as well create a gallery. Be sure to use matching frames so that your collection will still look fun and interesting. Choose from neutral, bold or dark shades – your choice is boundless.
Tags: decorating bare walls, McCreerys, McCreerys Home Furnishings, stylizing bare walls
Posted in Interior Design 101, Interior Design Elements, Wall Design | Comments Off on Bare Walls No More
Friday, June 30th, 2017
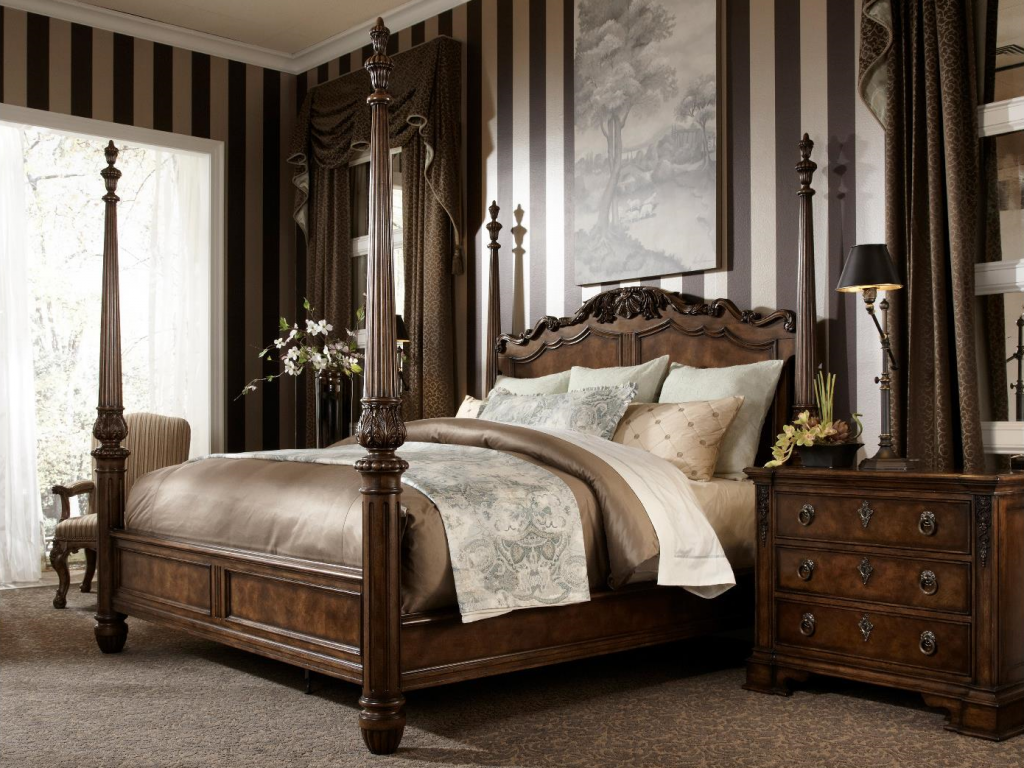
Belvedere Collection by FFDM: The enormity of this bedroom is emphasized by the vertical striped wallpaper.
Think of all the styles of wallpaper that you see in the market these days – from modern to artistic to contemporary – there simply is a lot to choose from. Of course, you must not choose the type of wallpaper that your Grandma had installed in your childhood home. Your Grammy may have found beauty in floral burgundy and green but your home is yours to decorate so what are you going to pick?
There are more options to look at nowadays. The trendiest include geometrics such as chevron. There are also those that look like fine art. There are also wallpapers that come in bright, bold colors. It’s all a matter of showing who you are now.
It’s the perfect time to show who you are now. This is your home, your turf. Find influence in magazines and online blogs. There are literally thousands of images to get your inspiration from. Find which ones are trending. If you are the traditional type, then find the ones that show classic styles.
Wallpapers are a dramatic means to express who you are. It is less permanent than paint so you always have the opportunity to transform your space. As soon as you have decided to use wallpaper, then your next goal should be to narrow down your choices.
Function of the Room
One of the first things that you need to consider is the room’s function. Majority of homeowners prefer pacific patterns as well as subdued shades when wallpapering the bedroom. But when they are out to decorate the livelier rooms such as the entertainment space and living room, the colors that they choose are supposed to be energetic, too.
A teenager’s room must have a more durable wallpaper when compared to a regular adult’s. The guest bedroom, on the other hand, can take the more fragile type of wallpaper.
Square Footage
Oversized patterns will only overwhelm a small room – that’s the general rule. This rule – just like many others – can also be broken, you just have to know how.
If you prefer anything dramatic, then use big patterns in darker shades. If you really have to, use more complex patterns and prints as focal points.
Remember also that lighter hues will make a room appear more buoyant. The simpler the prints, the more spacious.
Scale
You also need to consider the scale of your living space. High walls would look great with a vertical, long pattern. Lower ceilings will do with smaller and busier patterns.
Brightness
Don’t go for a dark wallpaper when you are designing a small room. This will only lead to a more cramped look. You can use bolder patterns inside a bigger room.
Frequency of Redecoration
How often would you want to redecorate your home? If you answered less than two or three years, then you could opt for the easily removable wallpaper types. There are now stick and peel types which will never even leave a mark on the walls when you use them.
Statement or Not
If the very idea of wallpapering still makes you feel uneasy, they try a patch on just a part of your wall. Always go for the simpler patterns at first if you’re not ready to make a statement. If, however, you’re ready to claim that title as the Drama Queen, then you might as well go for the bolder patterns.
At the end of the day, you must be able to create a story out of your wallpaper. This is what designers do. Cutout images from magazines, collect wallpaper swatches, and use them against the walls in the rooms that you would want to redecorate.
Always refer to the storyboard as you go along.
Tags: McCreerys, McCreerys Home Furnishings, wallpaper, wallpaper design, wallpapering
Posted in Accents, Interior Design 101, Interior Design Elements, Wall Design | Comments Off on Beautiful Wallpaper – 6 Things to Consider When Picking Wallpaper for Your Home
Wednesday, March 15th, 2017
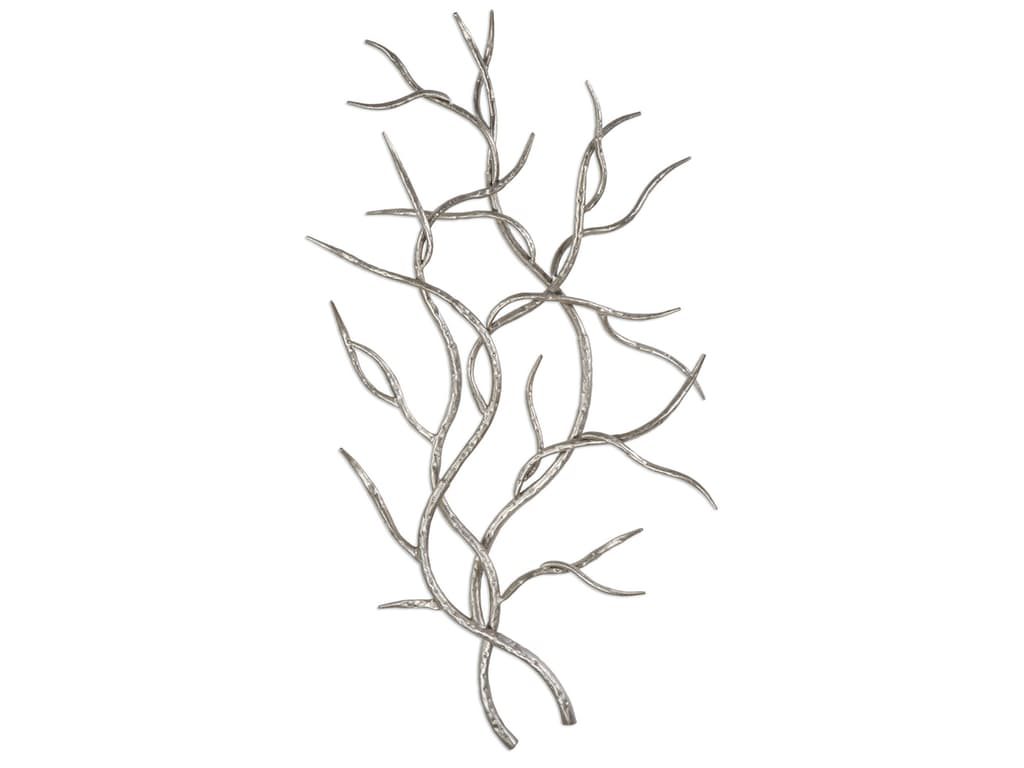
Uttermost Accessories Silver Branches Wall Art S2 04053
In interior design, we see oftentimes that wall art is treated as mere afterthought. This is the element that gets the least and last attention. This is even bought long after the final paint coat has dried on the walls of homes.
Doing this to your home is simply wrong. Wall art – when thought of last – will mean that you missed out on a lot of design opportunities. When this is chosen thoughtfully, it can provide visual interest that’s hard to match.
Wall art is crucial in any interior design.
If you’re not comfortable in choosing wall art, then don’t fret. Here are a few guidelines to help you get started –
Wall Art = Instant Color Palette
Picking a color palette is a difficult yet important phase in interior design. The various shades of paint that are being sold in home improvement shops are almost limitless so it is a daunting task for most homeowners to choose the color to use in their home.
Leave those paint chips and put your energies in picking wall art instead. As soon as you find a wall art or painting that suits your taste, then you would realize that it becomes a lot easier to pick the color palette that you would use in your home.
You can pick two or three shades from the wall art that you could incorporate into your home. Pick the dominant hue then add some shades that will be used as accents. After this, you can search for colors in these items that you would use to decorate. Should you still need help, look for apps that can help you match colors.
Wall Art = Focal Point
Another difficult interior design principle to satisfy is the creation of a focal point. This is that design element that will draw the eyes of the visitors towards a given space. This also gives the beholder a sense of expectation. A great piece of wall art, therefore, could fulfill this requirement.
Just imagine your artwork already hanging above the mantel of your living room fireplace. It could also be displayed prominently above the headboard of your bed in the master suite. A charming alternative solution is to create a gallery that could spice up the visual texture of a dining area or the kitchen.
Wall Art = Texture
Not every kind of wall art is usable. There are pieces that are two-dimensional, there are those that appear 3D while some are simply not suitable to your home. They may work in other homes with different architecture so make it a point to find that ones that you could really use.
Apart from prints and paintings, you can also use other art works such as shadow boxes or sculptures that can balance the art that you hung on the walls.
Digital art and some screens could also make a huge difference to those whose art style is more Avant garde.
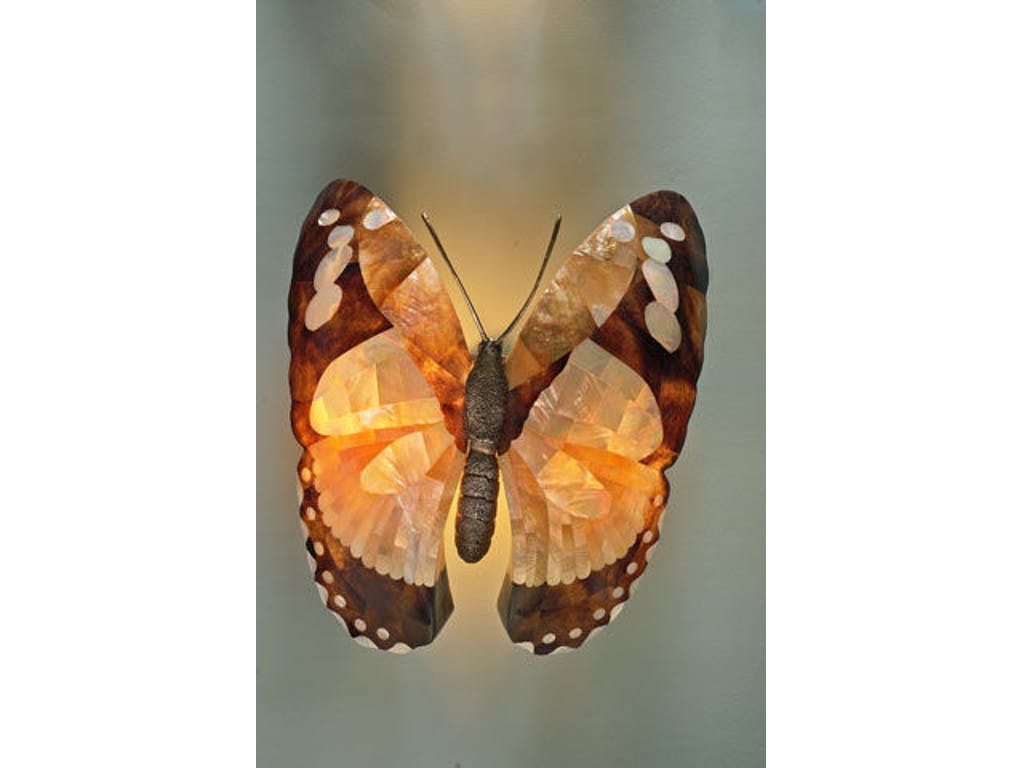
Maitland-Smith Lamps and Lighting Inlaid Yellow And White Mother Of Pearl, Penshell And Brass Butterfly Wall Lamp 1900-078
Wall Art = A Finished Look
Try thinking about those homes that you visited in the past that you did not like. Odds are, these spaces look a little rough around the edges or they simply do not look like their designs have been given much thought.
Wall art can be the initial or finishing element in your home. More often than not, it pulls a space together to make it look more complete. This is that extra touch after you have given your home the functional elements.
The key to picking the right kind of wall art is to make it enhance or even spur the design of the room. Again, this does not have to be the last design element that you should pick. Instead, from now on, give it much thought for it can actually make or break your overall design.
Tags: choosing wall art, McCreerys, McCreerys Home Furnishings, wall art
Posted in Accessories, Interior Design 101, Interior Design Elements, Wall Design | Comments Off on Wall Art – Why It Shouldn’t Be Placed on the Sidelines
Wednesday, December 7th, 2016
The Cynthia Rowley for Hooker Furniture Delancey Club Chair will look perfect against a brick backdrop.
One of the most interesting features of a home – no matter how quirky it may seem – are brick walls. That bold brick red color is sure to elicit attention. Admirers are many and so are those who think that it’s too gritty. No matter, if you’re determined to make it work for your home, then here are some tips that you need to consider –
Preserve Brick’s Beauty
If your home has those beautiful, exposed brick walls, then it’s a natural stunner. You would want to keep those bricks stunning by sealing and protecting the surface. Doing these will reduce the risk of degradation over time.
Applying slight gloss finish will make the bricks look lustrous. This is great for hallways spaces, otherwise, use a matte sealant that will not alter the natural look of bricks. Sealing will also keep mites as well as dust off, thus, helping in the maintenance of brick beauty.
Brick Cleaning
Brick walls may appear like they’re made of stones but these should not keep you from cleaning them. It is also advisable to clean the brick walls prior to sealing. Mix vinegar with water then spray the solution to the dirty spots. Rub gently with towel – use bristle brush only when stubborn dirt needs to be removed.
To make sure also that the bricks won’t crumble as you clean them, be sure to gently begin at an inconspicuous area. Harsher cleaners should only be used only when absolutely necessary.
About Moisture and Grout
Bathrooms and kitchens are moist areas so if the brick walls are found here, be sure to seal them so that mold and other such problematic issues don’t happen. If a bad case of grout has already taken place, then regrout the bricks so that a more solid surface is achieved. Do this by having the existing grout routed to no less than ¾ inch depth prior to refilling with fresh mortar.
Do this just once then gently seal and maintain.
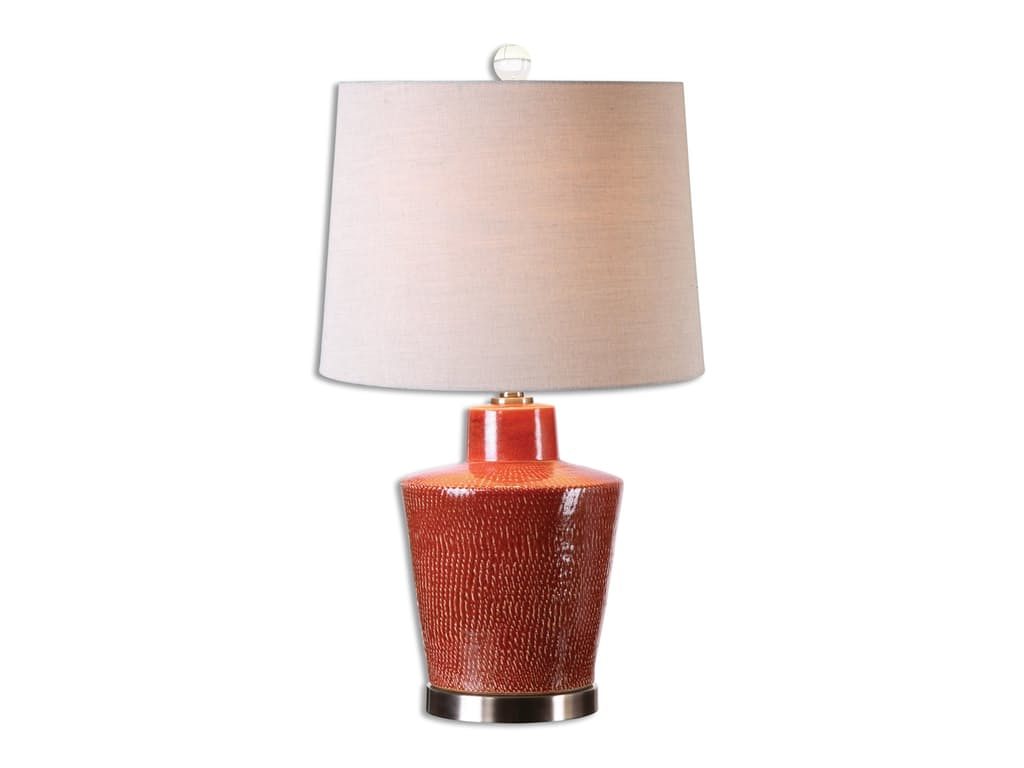
Lamps and Lighting Uttermost Cornell Brick Red Table Lamp 26903 proves that brick doesn’t always have to be on the wall.070
Finishing Options
Covering or softening bricks is easy with a fresh coat of white paint. White paint is a popular option for people who want to preserve the brick’s texture. Whitewashing the walls will also give them a cleaner and more contemporary look.
This look can brighten up space and would make it look less busy. You can achieve streamlining with the whitewashed brick concept.
The white bricks look can also be taken to your bedroom as it offers a dreamier appeal.
To whitewash, just mix some water with paint about 1 part water to three parts of paint would do. Loosely apply the mixed paint using a large brush. Let the primary application absorb and dry before putting another coat. Paint in uneven patches so that you achieve an aged finish. Don’t forget to tape off adjacent walls or baseboards as well as the floor with a drop cloth.
Another brick finish that you could consider is gray – the warm, soft type would do. This will give your room a more organic and earthy feel while still providing a clean look.
Bricks can also be stained. Just like wood, you can alter the color of the bricks without actually erasing its texture. You can also achieve the faux vintage appeal if you apply the stain using a small brush in just a few areas. This will give the illusion of some bricks being replaced over time.
A Word of Caution
Remember that painting bricks can be a tricky project. Paint may strip later but bricks are also highly absorbent, meaning, their porous cores make them quite difficult to perfectly paint. Skip the trendiest color choices if you’re uncertain on what look to give your brick walls.
Tags: brick, brick wall, brick wall design, designing a brick wall, McCreerys, McCreerys Home Furnishings
Posted in Interior Design 101, Interior Design Elements, Wall Design | No Comments »
Monday, November 7th, 2016
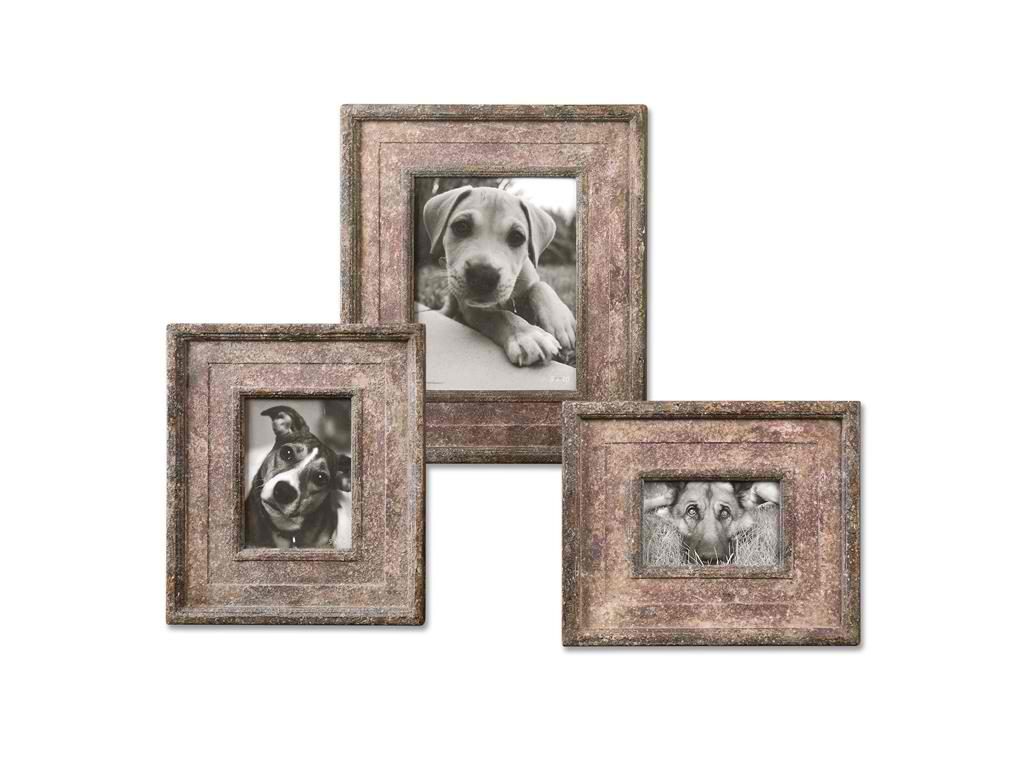
The Accessories Uttermost Zana Red Distressed Photo Frames, S3 18570 is not your regular photo frame.
Home decoration should be a fun, continuous process. There’s painting, hanging the artwork, choosing and using the right accessories, even investing in the right furniture, and it’s important to remember that every area is covered. Walls will always be an important part of the design process and every home has that one wall that needs to be dressed up.
Your problem wall could be one that is partially covered or it could be a strange-looking part of your home. Homeowners sometimes don’t see huge, blank walls, rather, a clean slate that they can dress up. Some see it as something that’s intimidating.
What’s great is that there are so many awesome ideas that will match your taste. Here are some of these unique ideas –
Stripes on Accent Wall
If you want an easy fix on that blank wall, then consider having it painted or wallpapered in stripes. This can be a great DIY task that will totally transform the visual aura of a room. You can actually do this project in just one weekend. Pick colors that will match the rest of the design then you can either go horizontally or vertically – the choice is yours to make.
Mirror, Mirror on the Wall (or Walls)
If you are going to dress up a blank wall, then it is probable that that wall is also windowless. Dreaming for some light in that room means you should know how to effectively use mirrors. A choice that you can make is to cover the whole wall with a flat mirror. You could also section off a portion to create the illusion of a window.
Hanging a variety of mirrors is one way to change the look in any room. Remember that adding a mirror or a set of mirrors won’t just change the overall décor but would also give additional light.
An Artistic Gallery Wall
If you have a lot of photos or artwork to display, then that empty wall is the perfect gallery. Turn the wall into a decorative element by creating an array of art. Stylize your gallery by picking frames and photos that coincide with your chosen theme.
Mix up, invent, create. Always plan the stuff that you would hang on your mini gallery so you won’t create any permanent error.
Passion for Wall Murals
Next to the instant art gallery is that chic wall mural. This is yet another way to show some art in your home. There are two choices for wall murals – first, there are the custom wall mural decals and the other is the simple paint art project.
Popping Shelves
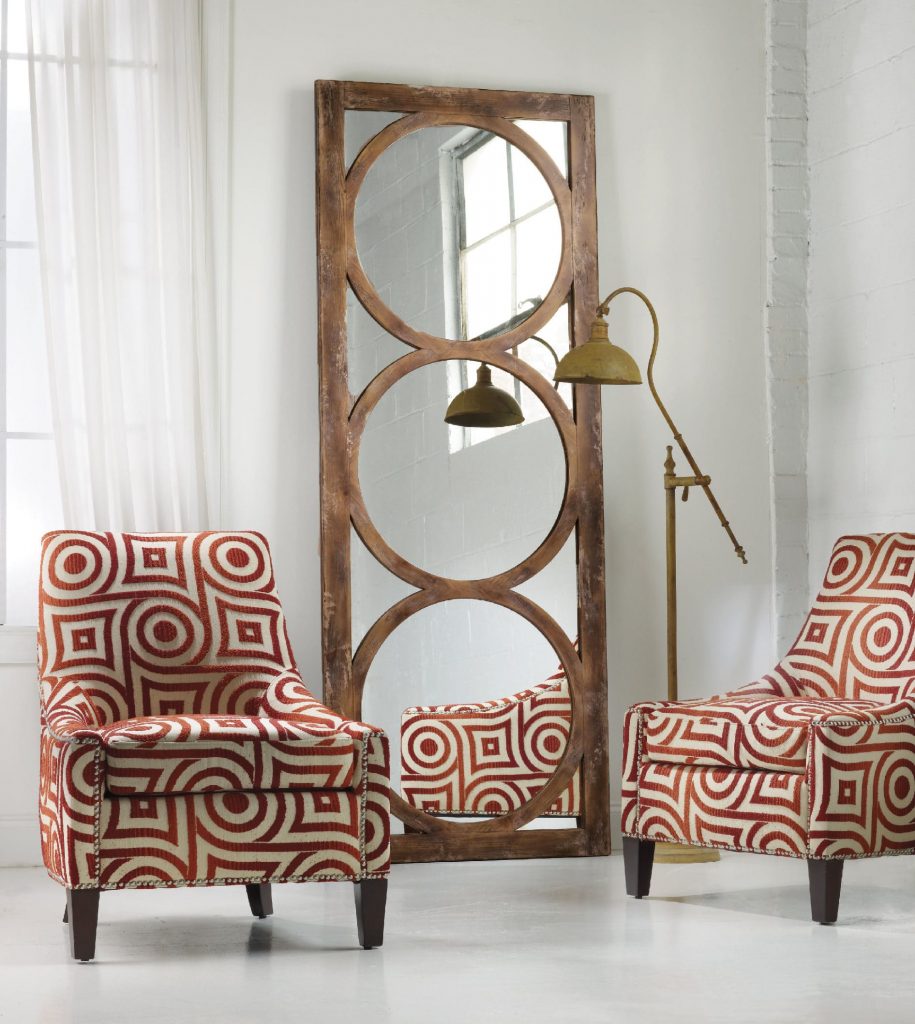
Hooker Furniture Accents Melange Encircle Floor Mirror
Unique shelving is also its own wall art. Use triangle shelves to decorate your walls. To add some drama and character, use some fabric to add color.
Use floating shelves to give you ample storage minus the bulky hardware. Use the ladder effect or use cubby shelves.
Good Ol’ Wallpaper
Wallpapering is both traditional and trendy. Create that trendy accent wall by adding some colorful or metallic wallpaper. There is a wide variety of wallpaper options that could match your current design. Choose from bold colors to neutrals, textured and patterned.
You can even miraculously replicate paint with the use of wallpapers.
The Family Chalkboard Wall
Whether there are children in the family or not, nothing beats that good old chalkboard wall. Just use a few coast of paint (use the chalkboard type) to make one wall stand out from the rest. Use this wall to post important messages to family members, greet birthday celebrators, or to play.
A more artistic solution to decorate your wall is to stencil your fave design or quote. Display your collections and you have just added the right character to the room.
Tags: art, art elements, artwork, artwork on walls, blank wall, blank wall designs, decorating bare walls, decorating with wallpaper, McCreerys, McCreerys Home Furnishings, mural, photographs on walls, stylizing bare walls, wall mural, wallpaper, wallpapering
Posted in Interior Design 101, Wall Design | No Comments »
Friday, November 4th, 2016
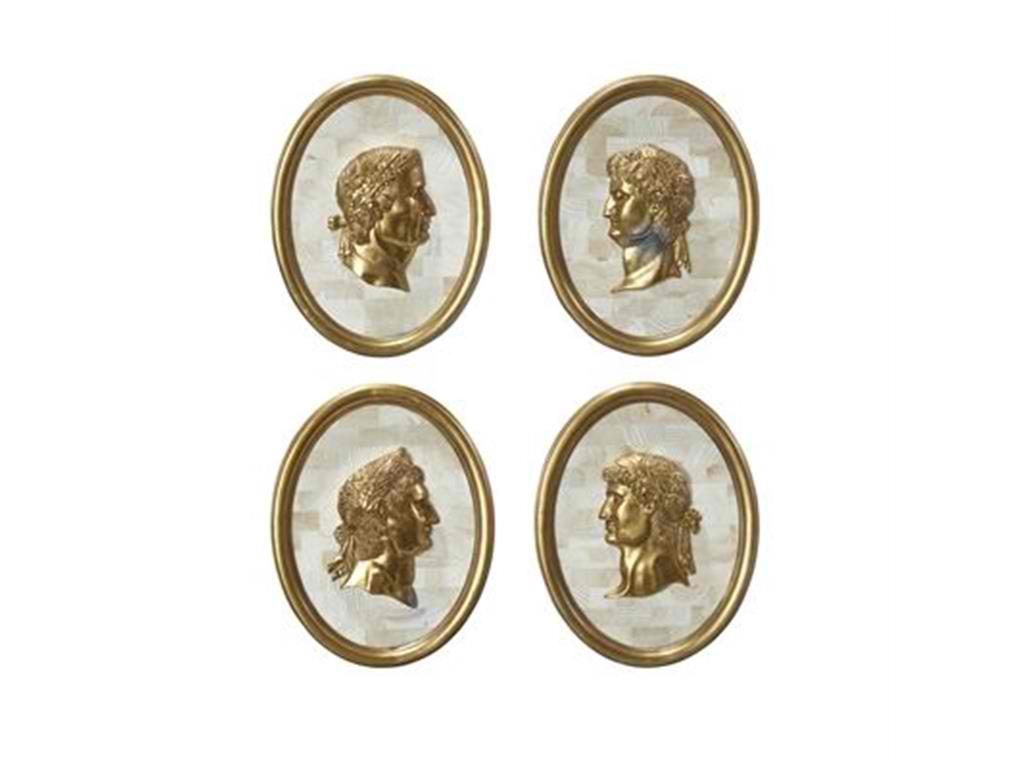
Maitland-Smith Accessories Set Of Four Gold Gilt Bust 1443-252
Did you know that wallpapering is one of the most effective ways to hide wall flaws? This is also a lot easier to use as compared to paint. To add to this, you can also easily remove and replace wallpapers. This is one design piece that isn’t permanent so you have many options to beautify your walls.
Still comparing it with regular paint, wallpaper comes in various patterns and designs. There are also a lot of customizable choices plus it is more cost-effective. Wallpaper can stay on your walls for more than a decade, some could even last for 15 years.
Know Your Wallpaper Type
Location is the most important consideration that you should make when you want to know the type of wallpaper that you would use. For example, if you’re planning to apply some wallpaper to the kitchen walls, then you would want the type that is washable and, most preferably, also stain-resistant. Wallpapering in the nursery or playroom should be the type that you could easily scrub. Bathroom wallpapers, on the other hand, should be moisture-resistant.
Generally, there are just three kinds of wallpapers and here they are –
Pre-pasted. This type of wallpaper has been pre-coated with some adhesive. This means that there is no longer any need to cover the walls with wallpaper paste once you install it. What you will need is just a bit of water or an activator so that the dry paste is activated and ready to be used.
Non-pasted. This type is also called as dry-back wallpaper. This does not come with pre-paste, hence, you will buy an adhesive for the application. It is best to use the wallpaper paste that has been provided by your manufacturer, though.
Self-adhesive. This is, as its name suggests, a self-adhering wallpaper. This comes with a sticky film so there is no need to activate the adhesive. Self-adhesive wallpaper is pretty much like a sticker, with each strip having its own backing, one that’s easily removed during installation.
Hooker Furniture Living Room Melange Beaumarchais Chest
Wallpaper Scaling
The scale of the patterns on your wallpaper will make or break the look that you create. Don’t be afraid to experiment and think outside of the box. Spaces that look like yours may look good on certain wallpaper patterns but do these represent who you are? Do these speak about your character or would you rather go for the patterns that represent you?
Don’t go with small patterns right away. Sometimes, of course, you really need to have small-scale wallpaper but when you’re in a much bigger room, then you have the leeway to use larger scale. With the right level of creativity, you should be able to make the room look more chic and glamorous.
Patterns are there for aesthetic purposes. Repeated patterns are great in hiding blemishes on your walls. Just be sure to line the edges of every panel, this could be challenging but worth your time once you perfect it.
As for geometric patterns, there are shapes that could appear too busy. The tighter the space between the shapes, the busier they look so be careful in choosing horizontal or vertical patterns.
Wallpaper Color Choices
Before finalizing your color choice, consider the room’s size, flooring material, furnishings and accent pieces first. If your furnishings have a cool hue, then you should say no to wallpaper with the same undertones. Go for colors that complement these warm colors instead. It wouldn’t be bad to pick a bold color this time.
Would you also want the wallpapered area to become your focal point? Then find something stunning and cause awe for everyone.
Be careful in automatically resorting to blue, red or yellow. Try soft or bold colors, ones that have not been tried too much in the past. You will see how much fun you’ll have by trying something new.
Tags: decorating with wallpaper, designing with wallpaper, McCreerys, McCreerys Home Furnishings, wallpaper, wallpaper choices, wallpaper design, wallpaper options, wallpaper types, wallpapering
Posted in Accessories, Interior Design 101, Interior Design Elements, Wall Design | No Comments »
Thursday, November 3rd, 2016
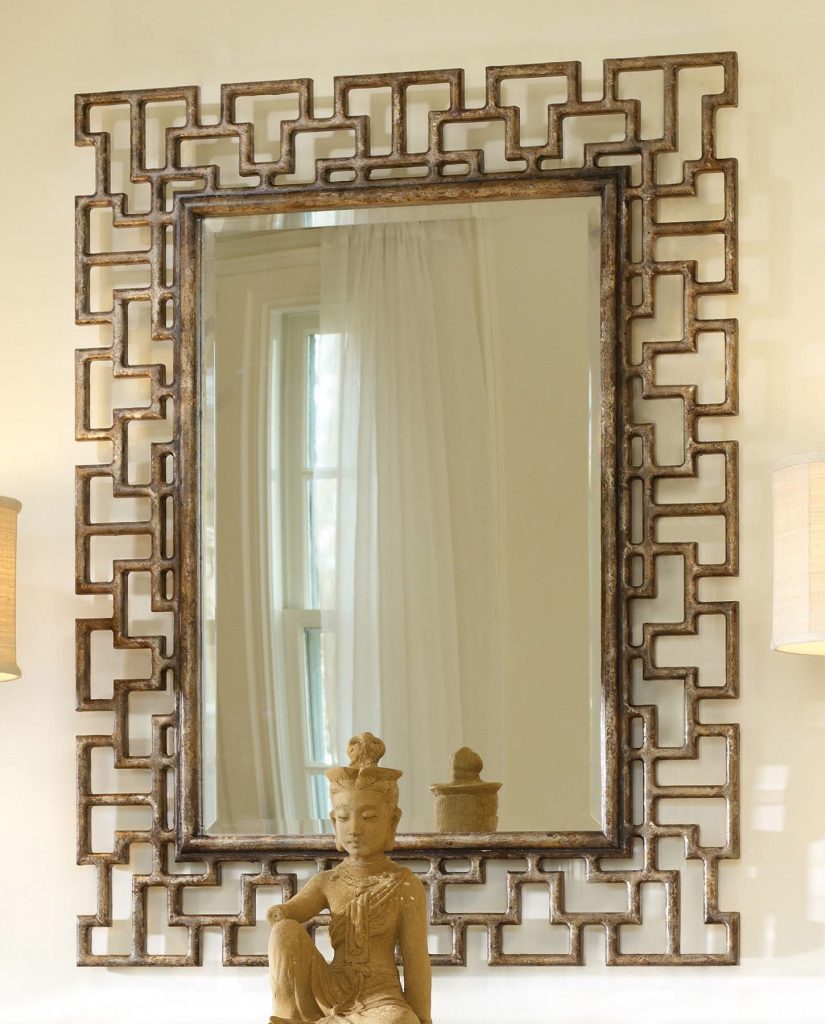
Hooker Furniture Accents Fretwork Mirror: Imagine hanging this beauty on your accent wall!
No homeowner should be against having an interesting accent wall. This is one design element that would make your friends and family members rave. Having an accent wall is not painting three walls with something neutral and one wall with the color that you really wanted in the first place. Having this kind of wall means you want to amaze people, to draw some attention, and to make them marvel at what they see there. So how do you make an amazing accent wall?
Accentuate Architecture
Having an accent wall means you have to appreciate and know how to use the architecture of your home. This will actually serve as your guide so be able to point out the most interesting architecture. An example of this is the wall where the fireplace was built. Now that should automatically become your accent wall. Having the fireplace in one of the three other walls would make it snag the attention that’s supposed to be given to the purposed accent wall.
Choose a Logical Paint Color
Take the time to carefully choose your paint. The best places for an accent wall include the wall that anchors the bed, a reading nook, the end of a long hallway, the bookshelf wall, and of course, the wall where the fireplace is situated.
The trick here is to use the wall that would be the star of the show. But be careful in creating this design masterpiece as it could also overwhelm your interiors. An accent wall should be able to make a statement without overpowering the room’s theme. Know how to create a visual impact by choosing a color that is bold or fresh.
Finding the correct color can be a bit challenging. Find a wall that’s within eyesight when you are standing in an adjacent room. The color that you end up choosing will have two roles once you use it on your accent wall and also when you see it from across another room.
Your preference matters when you are out to pick your accent wall color. Just make sure that it would stand out and that you’re ready to make a dramatic statement.
If you ever decide to have bright-colored walls on the other three walls, then choose a dark color still from the same color scheme. If, however, your other three walls come in dark colors, then find an accent color that’s two hues lighter or even darker.
Be Creative…Draw!
Remember those days when you were still a toddler and your parents always said you can’t write on the walls? Well, now that you’re older, you can begin your creative wall project by featuring your favorite song lyrics right on your walls, the map of the world, or your artistic painting right on the wall.
So go ahead, take a ruler, find a paint pen and create. Should you find your drawings hideous, then you can always paint over them and start all over.
Wallpaper ‘Em
Don’t be limited to paint when it comes to beautifying your accent wall. Remember that you can also use wallpapers to set up an interesting accent wall. Just make sure to balance the colors throughout the room that you’re designing. All other elements must harmonize with your chosen wallpaper texture, pattern and color.
When you are refurnishing, be sure to coordinate also your décor and the fabrics. You could also use a charming flower arrangement using the accent color elsewhere in your room.
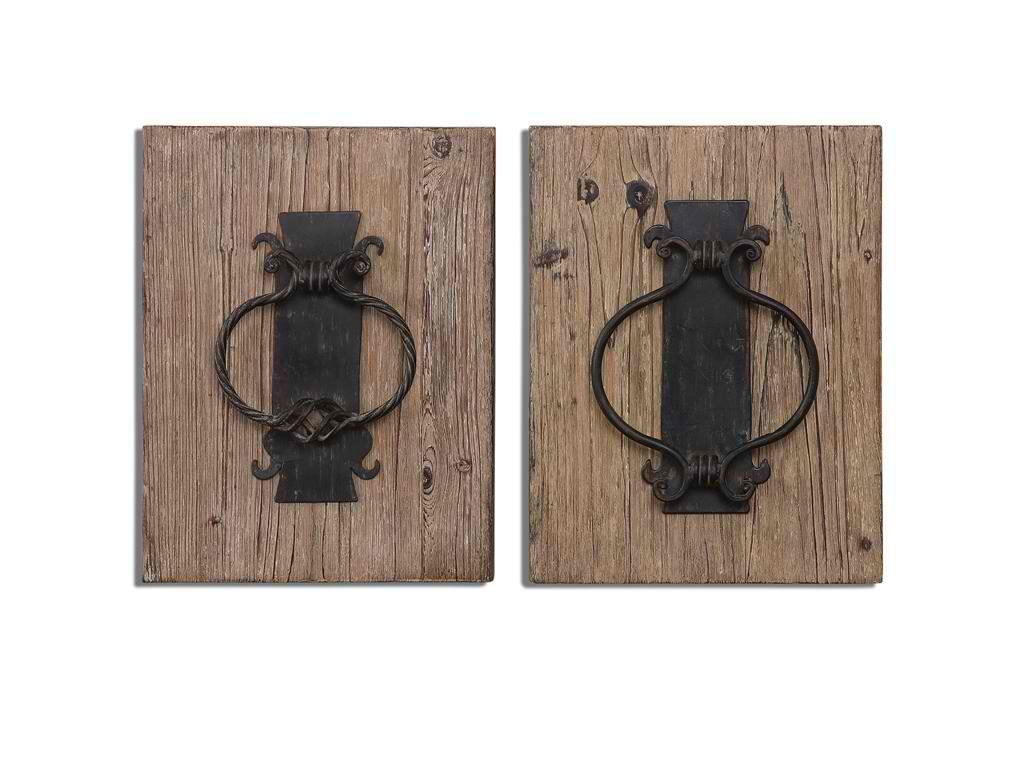
Accessories Uttermost Rustic Door Knockers Wall Art S2 07654
Rainbows, Butterflies and All Things Nice
Create your own version of rainbow wall by using color swatches first. You then need to get these supplies –
Paint brush or roller
Painter’s tape
Ruler or measuring tape
Paint cans in rainbow colors
Step one is to measure your wall length, divide it equally into the number of colors in a rainbow, then paint. To create straight lines, be sure to use a measuring tape and to tape off every other hue using a pencil.
Let dry for 1-2 hours and you’d have achieved that memorable rainbow accent wall.
Tags: accent wall, designing an accent wall, McCreerys, McCreerys Home Furnishings, wall, wall art, wall paint, wall painting
Posted in Accents, Interior Design 101, Interior Design Elements, Wall Design | No Comments »
Follow us on our social media
© McCreery's Home Furnishings | All Rights Reserved | Privacy Policy